Friday, September 25, 2015

Here we go....GUILT!


One year ago I quit my job as curator of the Gallery at Carrollwood Cultural Center in order to work on the eleventh painting in the Feeling Series. I worked steadily on the set up of the various props and furniture that I wanted for the painting and you can see the result below. I have had a few comments, like "I don't see guilt here", and why is there a gun in it" and "what's with the suitcases and handbags", "I don't get it", and "this painting is so different from the others". My answer is that this painting is about my feelings about guilt, presented symbolically. Having worked my way through so much of it during my lifetime; it feels like a chaos of baggage and failures, hurts both given and received, and the myriad layers of perceptions of guilt ranging from my role as a white person in a rarefied society, to my addictive personality, to many decisions I have made in my life that are not appropriate to discuss here!


This is a photograph of Guilt as it is set up in my studio. Much of my time over the past year has been trying to figure out how best to manage the workflow in my studio, with two Sundays a month given over to Painting For Fun, where I have as many as 9 people in the studio wandering around, and other students and projects that require a reorganization of the space. Many of these paintings reuse props that appear in other paintings and one prop that I wanted to use was the buffet table that was my mother's that I used in Fear and Shame

And I also knew from the start that this painting would be 48 x 48 and that alone creates a space management problem. I will have to stow the painting in my bedroom or office when I am not working on it. I wanted to use the best canvas I could afford which was Claessen's Belgium Linen, double oil primed. It is glorious to look at and feel! But very difficult to stretch and so I had a test canvas that looked horrible and it was not suitable at all. So I asked P.J. Draper at AOE Artworks, in Temple Terrace, if she could stretch it for me. She agreed to do it, and I was thrilled at what she was able to do, after much hand wringing and difficulties for her as well. The canvas was finished in early August, and I must admit that I have felt some Guilt, on and off, as it sat in the closet of my office, while I got ready to dive into the painting phase of the painting, which was very scary. 

After quite a lot of back and forth in my mind, I finally decided that this painting would be worked on a toned ground. Classical painters call this Imprimatura. The definition, thanks to Wikipedia, is:

Imprimatura is a term used in painting, meaning an initial stain of color painted on a ground. It provides a painter with a transparent, toned ground, which will allow light falling onto the painting to reflect through the paint layers. 

I learned to do this technique in a series of workshops with Aaron Shikler in the 1990s in Connecticut. How fortunate to be in the right place at the right time to be able to study with him at Lyme Academy of Fine Arts in Old Lyme, Connecticut. My other training was with Robert Brackman who worked the Impressionist style on a white canvas. The toned ground requires some special techniques that I do not normally employ, and the last painting I did in this manner was in 2001 when I finished Fear, just before I moved to Florida. So that is why I said it was very scary to cover that pristine white canvas with Burnt Sienna and Rectified Turpentine, which I am allergic to!

See what I mean? All that pristine white is about to be covered with a slop of burnt sienna and turps. Oh my!!!

Half done

Finished!!!

I also use a process I may have conceived (well I am SURE other artists have done something similar) that I call an overlay. Basically this amounts to a huge time saver when working on a portrait or complex painting that requires hours and hours of tedious drawing. My life is no longer one of leisure to fiddle for hours to get perspective just right and proportion figured out, so the overlay becomes an essential ingredient of my work these days. I do know how to draw! I teach it, for heaven's sake, but I am not so good to hit it correctly on the first, or even 10th try, so the overlay cuts time and makes my work more accurate. It requires a photograph that is blown up to be the same size as the canvas, in this case 48 x 48. I print the photo using Publisher which will tile the print out, and I had 15 images to paste together to make one big photo! Clear .5 mil overlay film is then put over the enlarged photo and traced with a felt tip pen. The overlay is then put over the toned canvas and transferred. When the painting is underway the progress can be checked for mistakes by putting the overlay over the painting to check for drawing errors. It is just so nifty.

I am holding a 48 x 48 foam board that contains my photograph of Guilt over which there is a clear plastic film that I call an overlay. I am tracing with an Identipen those little details in the lace cloth. Yeah, I know...a little obsessive and complusive, for sure. But it surely saves a lot of time in the end and helps the visual confusion when painting because it is so hard to make your brain go back and forth from canvas to the still life set up, over and over until you are crazy.


As work progresses I plan to add entries here on my blog as I did with Awe. It was a nice record to have and I must admit that I found myself referring back to it several times. So, stay tuned! More is about to come.

As an aside, I realize it has been months since I last posted work on my blog. I have quite a few paintings that I have completed during the summer and soon I will have them posted on my blog. I have put most of them on my website, but they are scattered over several places and it is more convenient to view them here. I will be posting them soon.


Tuesday, June 9, 2015

Painting For Fun Update

I have been very busy in the past few months. Painting For Fun is/was a great deal of fun, but also a huge amount of work for me, and I'm learning as I go along. I am basically offering two painting sessions a month with about 8 people in each one, which requires me to prepare 16 projects per month! Wow!! I finally figured out how to print on the lightweight canvas in pads made by Fredrix and that has saved me a huge amount of time. However, my printer is very temperamental and the canvas folds over and jams the printer time and again. I am waiting for an order of canvas that is designed for inkjet printing. We shall see if that helps.

I have a website with all the current projects listed with samples of them so that people can check it out in advance. www.paintingforfun.info. There are all sorts of goodies there and more are coming soon...Flowers, Angels, Geometric Designs, Scenic America, Lighthouses, and so on.

Most of my friends are novice painters and require fairly simple images to paint, but a few of them are more advanced and the following project is one that I made for them. It is Spiral Galaxy M74 as seen by the Hubble Telescope and painted by me. I tried it twice and the first attempt is safely in the local landfill. It was horrible, as I used black canvas and that was so difficult and I couldn't find any reference points in the photograph of the Galaxy to focus on. In the end I turned the photo into a greyscale image and printed it on the canvas and painted on top of it. Even so, it was difficult for me as I kept losing my way, which I suppose is the whole point of being lost in space.

This is painted in acrylics with various glitter paint and glow-in-the dark glitter added here and there. I sprinkled the glitter on small glue dots to give it some interesting sparkle. Most of the white points were simply dots of white paint.
 
This is an image I shot with a huge ISO in my bathroom with the camera hand held which is why it is somewhat out of focus, but you can see the glow-in-the dark paint showing up in the middle of the spiral.
And for all you folks who love mathematics here is the diagram of the Golden Spiral superimposed on top of the Galaxy. Is it any surprise that it is correct mathematically? I am using PhiMatrix, a nifty program that allows you to figure out all kinds of things related to the Golden Mean. If you are so inclined you can find it by doing a Google search. 


Friday, April 24, 2015

Divinum Spiralem

Divinum Spiralem        Egg Tempera on Gesso Panels    
16 x 20     Private Collection

Divinum Spiralem is a series of 7 small Egg Tempera paintings mounted together to create one artwork. It was started in 2013 and finished in 2015. Those shells are much more difficult to paint than one would imagine! I said I wouldn't do any more miniature sized shell paintings, but now that this is finished I might be lining up my egg yolks to do some more. We shall see!

Wednesday, April 22, 2015

Radiant Fruit Show - I win a First Prize

Genesis: Orange       6 x 8      Egg Tempera      $450
First Prize at Carrollwood Cultural Center "Radiant Fruit" 
April/May 2015

Click here for Tampa Tribune Article

Monday, March 30, 2015

Painting For Fun


The photos show the first ever "Painting for Fun" workshop which was Sunday, March 29th, from 1:00 - 4:00. Coffee, tea and cookies were served with the artwork and paint!

Friends, and friends of friends came to my studio for an afternoon of painting. I spent a great deal of time and energy coming up with various designs, most of which I got from some very nice coloring books published by Dover. The outline drawings were enlarged and then I transferred them to either a piece of lightweight canvas, or a painting panel. Everyone got a small colored version of the artwork and they painted it in acrylic paint. I didn't know what to expect but it turned out to be very much fun, and everyone had a good time.

I can comfortably fit in 8 people and so far I have 3 signed up for the next workshop which will be at the end of April. I am working on a website for the Painting For Fun Sundays and will have many themes and ideas that people can select to paint. We had some beautiful flower designs, some geometric abstracts, angels, and a lighthouse that will be the first of many, using my own designs that I made many years ago.


Tuesday, March 3, 2015

Painting with Eggs Workshop Sunday

Margret putting on the finishing touches to her landscape

Nancy working on her painting

  Nancy's finished painting 

Peggie with her finished painting

 Peggy with her Flower Painting

  Robert working on his painting

Robert's finished painting 

Yolanda with her 2nd finished painting!

This was the most successful workshop I've done! Egg Tempera is unlike any other medium and requires a lot of concentration and attention to detail. It is not for the spontaneous painter, as it is difficult to make changes once it has begun, so everyone came with a photograph or drawing sized to the panel size they chose in advance of the workshop. We used several methods to transfer our drawings to the panel and once we separated the eggs we could start to paint. I had a wide selection of both pigment dispersions and pigment pastes to choose from. 

Everyone went home with a nice painting and a new understanding of what Egg Tempera painting is all about. I hope some of them will continue to choose to paint in Egg Tempera as it is not as fussy as people believe and the results are beautiful and luminous jewel-like treasures. Thank you, everyone, for coming and I hope we can do this again soon!

Sunday, March 1, 2015

Painting With Eggs Workshop Saturday


I have done a few Egg Tempera workshops but most of them have not been very well attended, and in truth the people who came didn't really like working in the medium. But this one was totally different. The participants were all current or past students, and friends of mine and so I knew what kind of group I would get. It was marvelous!! The pictures below show my studio turned into a cluttered workshop space where everyone seemed focused and relatively happy, although Egg Tempera's quirky ways didn't sit too well with a few, but we will work that out on Day 2.

I was blown away by the work everyone has produced. My photographs are at the end of the day, on Saturday, and by Sunday afternoon I suspect we will have some really splendid examples of the beautiful medium of Egg Tempera to show off here. I am so pleased with how the workshop went I am planning for the next one.

 I had planned for a maximum of 8 people and one couldn't make it so we were 7 and it looks crowded and cluttered, but it was just fine, and one more would have fit in well. Perhaps next time. Robert and Peggy are pictured on the right.

Robert's Dog
Peggy's Flower
Margret and Natalia
(the computer was handy in showing some Egg Tempera artists websites and a few suppliers of the dispersions and pigments we were using) 
Margret's Landscape
Natalia's Tree
(she seems not too pleased with her efforts, but it was really very nice, in spite of what she thinks!)
After intense concentration for hours some levity must follow! Here they are examining one of my plastic hands. 
Nancy with plastic hand. Someday that thing will make it into a painting!
Nancy's Painting
Peggie's Still Life
We have one Peggy, one Peggie, and one Margret in the workshop.
You can tell by Yolanda's big smile that she is really pleased with her avocados!

Wednesday, February 4, 2015

Workshop in My Studio


Last summer I was contacted by several people in the Chinese/American community in Tampa, asking if I could do a painting workshop for some visiting Chinese people who wanted to experience things in our country, and they were keen to try out painting. I agreed without question, and during the summer I held 3 sessions in my studio for four visitors from China. Robert Chen was their driver and interpreter because only one of them spoke English, and we had to figure out how to explain art terms. During that workshop I had them paint small studies in oil paint from little still life set-ups that I gave them. (Robert Chen is the man in the dark red shirt).

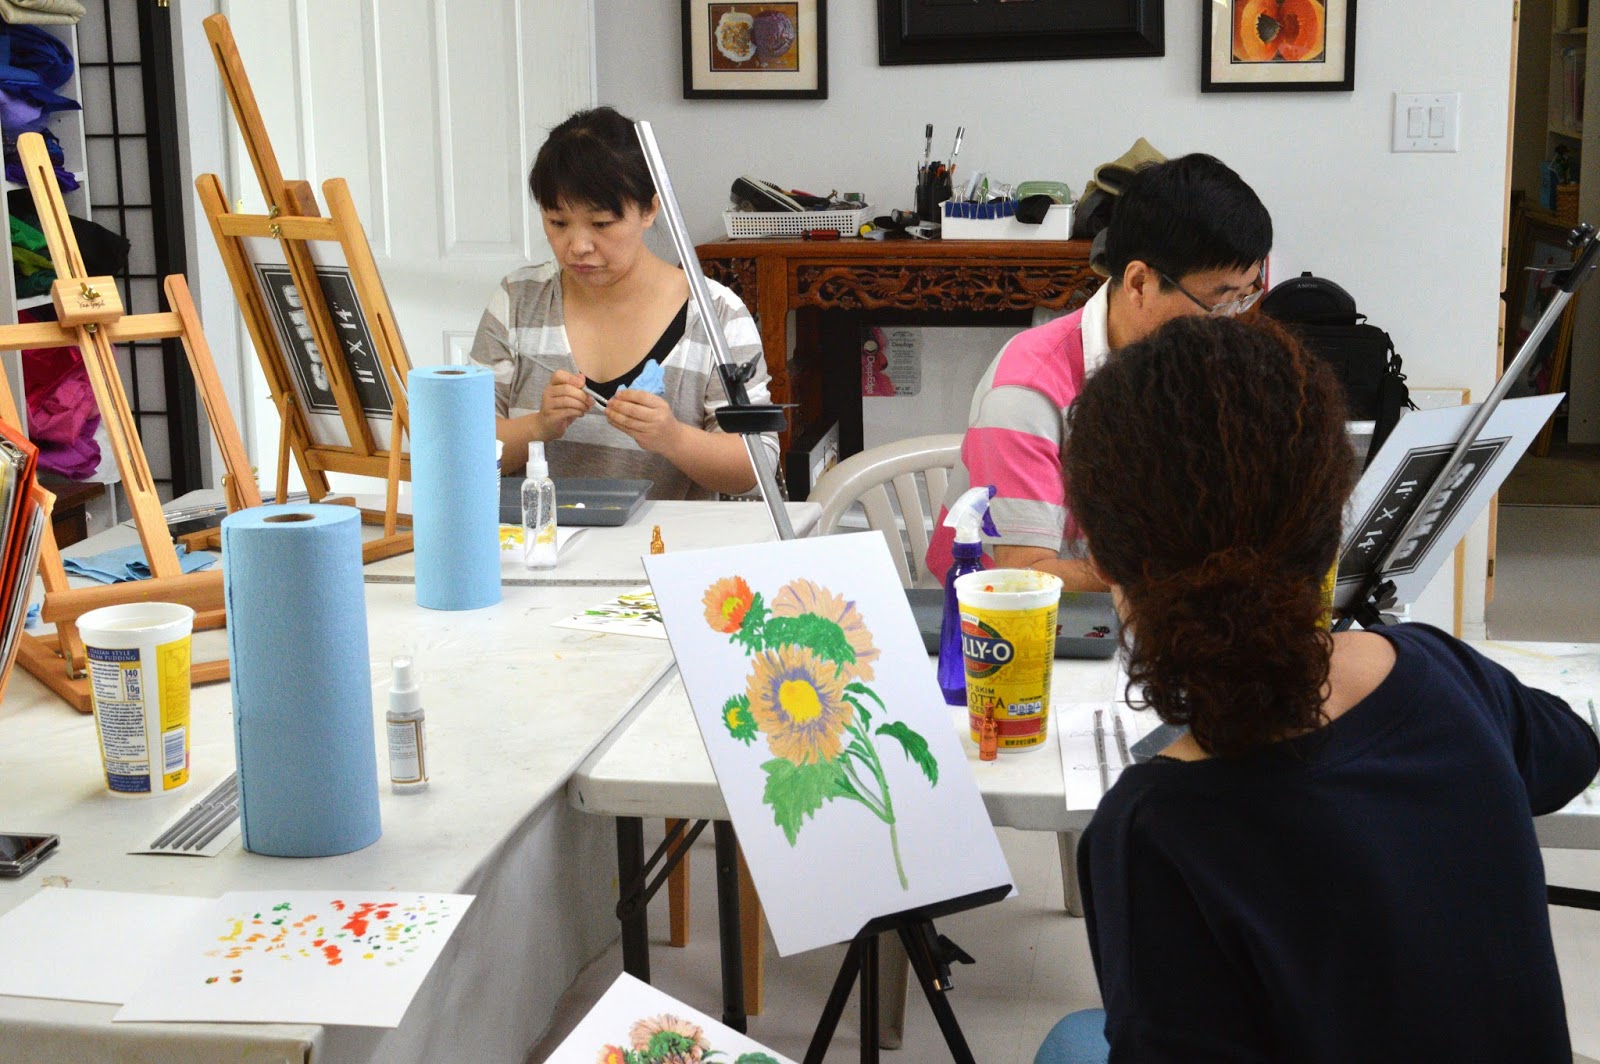
Then last fall Robert contacted me again with another proposal for a painting workshop, and slowly it evolved that I would do it in my studio for about 8 people. Today it was actually 5 painters and one onlooker, but it was a great day and the photographs below show how much fun everyone had. I had decided to do a modified "paint by numbers" session and prepared the paintings in advance, setting up a painting panel and an unstretched canvas. I made them all 11x14 so a frame could be easily obtained. I decided to do acrylic paint rather than oil to help in transportation. The oil paintings didn't dry for days last summer!

Last fall I was at Selby Gardens in Sarasota, and found a Dover Publication of a coloring book of Pierre Redoute's botanical flower paintings in their gift shop. These paintings are so elegant! Redoute was affiliated with the court of Marie Antoinette and other monarchs of France. The coloring book had small thumbnail images of the colored painting, and I could blow up the line drawings to make them bigger. I selected about 8 drawings from the coloring book, and transferred them to my panels and canvas and gave each painter a small blow-up of the colored painting to follow. 

In the beginning of the workshop I had all the tubes of paint laid out and showed them how to put dabs of paint on the palettes and did a very brief demonstration of how to mix colors. Then they were on their own, taking my pencil images and filling it in with colors. None of these people had painted before! Amazing...they all had a great time and went home with a nice painting. We will be doing this workshop again week after next, so I hope to have more photos to show.


Tuesday, February 3, 2015

Lady with a Cockatiel

Oil on Canvas       20 x 24      POR
The "Lady" is my dear friend, Carole Flagg, who at 87 is still producing a massive output of marvelous paintings. You can see some of her work on her website: www.caroleflagg.com 

I met Carole shortly after I moved to Florida when we both were associated with Horizon Line Gallery in Temple Terrace. She took some of my classes and we began a friendship that continues to build in mutual support and appreciation of each other's experiences and talents. Today I meet with her every Saturday afternoon for our "coaching" session. Carole wanted to learn oil painting techniques, and having been an acrylic and pastel painter for many years she wanted to add oil paint to her repertoire. She still works in acrylic and pastel, but has found wonderful success as an oil painter too.

I shot this photograph of her several years ago, when her beloved pet bird was still alive. Sadly he is not with us any more. What a character that bird was! Unable to fly and picked upon by other birds in the large cage downstairs at the residential facility she lives in, she took him to her apartment and his life was forever changed, happily so, as he had a nice place to live, plenty of good food, and a new "mother" who doted on him. He often perched on her shoulder or hand. I was so amused by him, as he would greet me with clicks of the tongue, that I could imitate back at him, and he and I had many dialogs about lots of important subjects, of interest to birds.

I used to paint lots of portraits, especially pastel head studies, but the economy and shifting tastes has changed much of that, and I found that I didn't have a market for portraits after 911 and our move to Florida. I missed the excitement and challenge of portrait painting, and so after much deliberation, I decided to add Portrait Painting With Help to the growing list of art classes I teach at Carrollwood Cultural Center. Over the summer I put together my plans for the class and started several oil paintings that I could use as demonstration pieces in my class. The class is a great success, and I'm happy to have an opportunity to move back into doing some portraits. 

Some of my art friends have said that I am a "still life painter" and I wished to change that image of myself! I enjoy painting everything. The challenge of portrait painting is greatly helped by an invention of mine that involves making overlays to find mistakes as we go along in the painting process. I spend quite a lot of time with a photograph to make it useful for portrait painting, and blow it up to the exact size of the canvas, and edit out most of the distracting background elements, and in place of them I add a background that will enhance the painting. It is a great help to be able to see what I want before I start the painting. A quick change in the photo editing program can show me a new color, or value, before I spend hours painting it. I love my computer!!!


Thursday, January 1, 2015

Alex

Alex       16 x 13    Pastel on Art Spectrum Paper

My friend, Erika Remsberg, brought her son, Alex to my studio for me to take some photos for this pastel. I had done Jordan, Alex's older sister, several years earlier and we wanted to wait until Alex was old enough to have the personality that you see here. I had my camera mounted on a tripod and I set Alex up so the light would rake across his face. I was using my Nikon camera and in a stroke of inspiration I gave Alex the wireless remote shutter device and had him take his own photograph. The expression is so classic and wonderful I couldn't wait to dive into this painting. Naturally I had to do quite a lot of photo editing and fussing around before I got to the actual application of pastel to paper, and it took me a long time to get it right. This one was a joy to do!